Showing posts with label Knitting. Show all posts

More birthday craftiness

{ Monday, August 16, 2010 }
Almost two months later, I'm finally finishing up the last of the birthday posts. Today, I have two more handmade gifts to show you. First up is the growth chart.


I'm really cracking myself up with my photoshopping. Of course our bean has a real name that we do use that I stenciled on the chart, but since we don't publish her name here, I had to get creative.

I made the chart out of a strip of linen fabric that I embroidered with brown and green thread. The green doesn't show up in the photograph at all, but there is a repeat of the brown pattern at the top of the chart. I then added a little interfacing to stiffen up the fabric and sewed on the patterned backing. I had never made anything with the backing folded to the front like this, so it took a bit of practice and planning to make the corners neat, but it wasn't difficult at all. Finally, I used fabric pens to mark the distances and color in her name. I was too cheap to buy a whole alphabet's worth of stencils when I only needed a couple letters, so I printed out the bean's name in a large block font on a piece of heavy cardstock and cut the letters out with a utility blade. Time consuming and tedious, yes, but it got the job done.

When it came to hanging the thing on the wall, I was stuck. The boy and I both agreed that we liked the clean look of just the rectangle without any long hanging ties showing, but since we're talking about fabric, most of the hanging options we considered would end up with some sagging somewhere. We almost just drove nails right through the whole thing to attach it to the wall, but thank goodness we decided against that. I ended up making a fabric casing for a wooden dowel that I was able to attach to the back of the chart fairly invisibly. We then nailed a picture hanger right into the dowel and hung it that way. The very tip-top of the chart rolls down ever so slightly, but its barely noticeable and that's close enough to perfect for me!


As it turns out, its difficult to photograph a 5ft long strip of fabric, or perhaps we need a different camera lens, or both. In any case, you're stuck with this arty angle in order to see the detail of the embroidery.

The final handmade present, is this sweater that I posted about a really long time ago. I finally got around to finishing it in time for her birthday. Well, its almost finished. Its in need of two more buttons since I miscalculated the number I thought I'd use. Yes, I understand this displays an inability to count to ten correctly. I haven't been quite as sharp as I used to be since the bean came along--I think it maybe has something to do with not sleeping through the night in over a year.


This sweater is the presto chango sweater (ravelry link). The front panel is completely removable so that it can be swapped out for a different pattern or larger size, how cute is that? A wool sweater may seem like a strange gift for a late June birthday, but I knit this in a 2T because I'm realistic about the amount of spare time I have I wanted it to be big enough to fit for winter. See, those two missing buttons aren't much of a problem--she won't need a sweater for a few more months and she probably won't be big enough to fit into this for another year. All part of my plan, I swear!


The bean says thanks for stopping by and looking at her presents!

Knitting Lessons

{ Saturday, March 20, 2010 }

Rocking the faux-hawk and playing with mama's knitting.
I hope you someday take needles in hand and get as much enjoyment out of this craft as I do, little one!

Sweater Fix

{ Sunday, March 14, 2010 }
When I was getting the bean dressed for school the other day, I noticed that a yarn end had worked its way loose on her (brand new, store bought) sweater. My first instinct was to cut it off, but on closer inspection I saw what looked like a bunch of dropped stitches,

And proceeded to FREAK OUT

For half a second

before coming to my senses and remembering that I'm a KNITTER and should know how to fix the stupid thing, so I decided to fake it. I pulled out my tiniest crochet hook and picked the "dropped" stitches back up easily enough, but it took a bit of studying for me to figure out what to do with them.

Scary stuff

I ended up threading the broken yarn onto a yarn needle and sewing the top stitch of each ladder back in, then knotting the broken ends together. I have never succesfully completed a fix like this (I have a pair of handknit socks languishing in the back of a drawer because I couldn't figure out how to fix a hole), so you can imagine it took some time and a few different tries to get this to work.

But work it finally did. Yay me! I conquered the cute as can be sweater with the teeny-tiniest stitches ever. I am so glad that I figured this out, but I hope to never have to do it again (especially at this small a gauge). And oh yeah, this totally cured me from wanting to knit a baby sweater with teeny tiny needles.

Knitting? What's that?

{ Friday, February 26, 2010 }
I knit for the bean like mad during those agonizing days leading up to my due date and in the first few days after, but I put the needles away during the second week I was overdue. I knew that there'd be no time for knitting after she arrived and I didn't want to leave something half finished on the needles. As it turns out, that was the wrong approach. There has been no time for planning a new project--picking a pattern, swatching and experimenting with needle sizes--but there have been a few minutes here and there where I could have picked up some work in progress and knit a few stitches. Unfortunately I had nothing, not even a half finished sock, to pick up and work on. Until now.


The bean was extra sleepy during her recent illness and, since she takes her best naps in our bed, I sat with her while she slept. And knit.


I finally decided on this little sweater (Ravelry link).


Now you may be thinking that I forgot a thing or two during my hiatus since this sweater doesn't look very sweater-like, but trust me.


Here, does this help?


See? there's a little origami involved.


I'm still working on the front lace panel, but I'm so in love with making things for the bean. There's such instant gratification involved with knitting for a baby (unless we're talking about blankets, which take about 10 years to knit). Hopefully at some point in the future, I'll have time to knit adult-sized garments.

Until then, I'll keep making bitty baby things, a couple stitches at a time.


PS You didn't think I could write a post without a picture of the bean, did you?


The longest 10 days of my life

{ Saturday, June 27, 2009 }
The longer she makes us wait, the more I knit,


and sew,

Very baby pocket diapers, microfiber inserts, and hemp fleece wipes.

and bake.

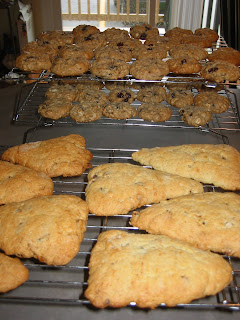
Ginger-spiced scones with cashews and dates from Vegan Planet and chewy oatmeal-raisin cookies from Veganomicon.

38 Weeks

{ Wednesday, June 03, 2009 }
I've been saying this for a while, but I just can't believe how far along we are in this pregnancy. 38 weeks! While I feel completely and utterly ready for this pregnancy to be at its end, I'm also shocked at how quickly the time has passed.

Truthfully, I've been really uncomfortable lately and, though I'm trying to stay positive, I was pretty down today. Luckily, our incredible midwife completely cheered me up at my checkup by joking with me that the baby won't come before I'm completely miserable and reassuring me that just as many women have their babies in the two weeks before their due dates as have them in the two weeks after. I asked her to check me and then lie about what she found and, while I'm typically prissy about talking about such things as the condition of my cervix, I'll share what she told me. The bean is low, although not yet engaged, and I'm a fingertip dilated. Now I have no idea whether she was just complying with my request or actually telling me the truth, but it doesn't matter one bit. I can pin all my hopes onto a fingertip's worth of dilation and that should get me through another week. Hopefully by then there'll be a bit more progress and that can get me through until our due date (at which point I may cry hysterically and beg the bean to please come out, but we'll cross that bridge when we get to it).

Anyway, lets all distract ourselves with some crafty goodness, eh?

First of all, I am more-than-a-little-bit proud to announce that the blanket I have been knitting this entire pregnancy is now complete.


This should give you an idea of the size (it turned out quite a bit bigger than I had planned, but the boy and I both agree that the larger size is better, after all).


And the border. This is the Prairie Blanket by Oat Couture knit with some super soft alpaca yarn we picked up at Rhinebeck last year.

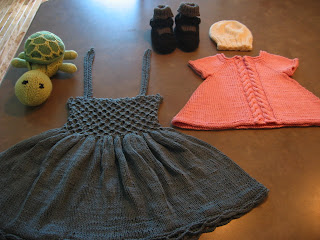
Next up is the Helena sweater


and a Cable Cap


both of which were also knit from some yarn we picked up at Rhinebeck, but I seem to have lost the ball band. I'm fairly certain it was superwash wool, but now I might be too scared to wash it in the washer. I guess we'll see how it wears before I decide.

And finally, a Tri-peak hat.

And I may still owe her a pair of booties, but that's probably enough wool for a baby who'll be born in the summer, don't you think?


I'm still working on all those knit toys I promised to make and, of course, there's always diaper sewing to keep me busy until she finally decides to make an appearance.

Introducing Sheldon Turtle

{ Thursday, January 08, 2009 }
I had planned (well, I'm still planning, actually) to knit a bunch of toys for our bean. We'll, of course, use them just for decorating the nursery at first and then she can play with them after she gets old enough.

I started with Sheldon from knitty, but I got partway through and decided it just had to belong to the boy's little niece, so I hurried up and finished it for christmas. Here he is, all ready to go.


I am so pleased with how he turned out. Its just the cutest little thing. You know the shell comes off? Its just too much cuteness, really. I can't wait to make another one for our jelly bean.

Thankful for Dairy

{ Wednesday, November 26, 2008 }
This pumpkin cheesecake has been my go-to thanksgiving recipe for as long as I can remember. Last year, when we were "most of the time vegans," we indulged on thanksgiving, so I can honestly say I haven't missed a year since I started making it (its really that good). This year, I had planned to try veganizing it, but ended up making the full-fat, full-dairy version, since we're off the vegan wagon for now. I usually make a few slight modifications to the recipe, and this year I also left the bourbon out of the topping, out of respect for the little one in my belly who will also be enjoying it (and hopefully won't be tasting bourbon for many, many years). The best part about this recipe is that it makes too much for my springform pan--just enough extra to fill two individual pans. The large cake will go with us to the sweetie's family tomorrow, the other two . . . well, I'm sure we won't be letting them go to waste.

As if that weren't enough, I also made one of the sweetie's favorite desserts for the long weekend. This cake is so incredibly easy to make that it really doesn't have any right to taste as good as it does. The main ingredient is Famous Chocolate Wafers. I never use these unless I'm making this particular cake and I don't know anyone else who does either, which makes me wonder how the company stays in business. Actually, every time I go to the store for them I expect them to be gone, but there they always are. (Google just told me that these are made by Nabisco, so I guess the company is safe after all). In any event, the recipe goes something like this: whip up some heavy cream (a pint or two will do), splash in some vanilla and a few spoonfuls of powdered sugar. Layer wafers with cream, chill overnight, et voila . . .


When I was growing up, my mother would make a version of this with mint flavoring in the cream and garnish it with maraschino cherries for Christmas. The sweetie is a purist, so we have the plain black and white version.

I threatened some time ago to share a picture of the blanket I'm working on for the bean, so I figured I'd surprise us all by actually following through! This is the Prairie Blanket by Oat Couture knit in some undyed wool we picked up at Rhinebeck this year. The picture really doesn't do it justice--the yarn is just stunning in person. I'm very happy with how this is coming out, despite the fact that it looks like a shawl at this point. It will someday grow up to be a real blanket!


Have a lovely holiday tomorrow. This year is especially meaningful to me because of all the many blessings in my life; thanksgiving is as good a day as any to remind myself not to take one second of it for granted.

Apricot Update

{ Wednesday, October 01, 2008 }
Thank you so much for all of the well wishes on our engagement. The boy and I have been so thrilled with all of your comments and are really touched by the support we've been getting.

I have no idea how to segue from that to knitting, so let's just dive right in, shall we?

I had ample knitting time during the drive to and from Vermont last weekend. (The sweetie takes public transportation during the week and actually prefers to drive on the weekends, so who am I to argue?) Unfortunately, I have very little to show for my 10 plus hours of knitting. Remember that I had heard the pattern was difficult to follow? Well, it got me. Twice. I finished the back with no problems, but the fronts are a different story. See the pink yarn threaded through them here?


This is the point where I start decreasing to create the V at the neckline. The pattern provides directions for the left front and asks you to reverse the shaping for the right side. I'm knitting them both at the same and somehow, while trying to reverse shaping on the fly and in my head (mistake #1) I ended up with decreases that didn't match. I snapped this picture after I got almost to the end and realized my mistake. Immediately after snapping this picture, I ripped back to the line.

Attempt #2. I fixed my issue with the placement of the decreases and happily knit back to the same point on the drive up to Vermont. Now, confession time. I was understanding the armhole shaping and the decreases along the front edge, but then the pattern does something I didn't get. Bind off for the shoulders and then continue knitting. Wha? I figured all would be made clear in the fullness of time, but I got to that point and still didn't get it. I read ahead (something I should have done before starting, I know) and saw some reference in the finishing instructions to attaching a neckband. There were no instructions to actually KNIT a neckband. And then, it all made sense. I continue knitting a thin strip of fabric that is later joined and attached to the back to FORM a neckband. Perfect, except for one small problem. I had refigured the neckline decreases to account for my different gauge and I had way too many stitches left. I was making one huge neckband. So . . . . here it comes . . .

I ripped back. Again. To the exact. same. spot. And I reknit on the drive back from Vermont. So today, as I type this, I am only slightly farther along than I was in that picture up there.

Its humorous that even with the warnings about the pattern and with all the research I did, this crappy pattern still got me! Although, the situation is slightly less funny when I think that there's only a slim chance that this sweater will actually fit me when I'm done. I just hope I can finish it before spring.

Apricot Jacket

{ Thursday, September 18, 2008 }
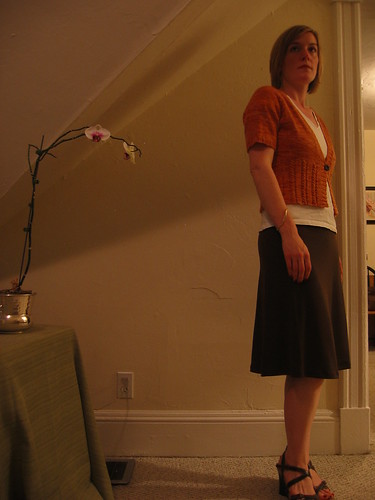
When I first saw this sweater at Skinny Rabbit way back in 2004, I fell in love with it. I love the girly eyelet details and the figure flattering ribbing, but at that time I didn't feel like my skills were up to the challenge, especially since the pattern is originally written in German and the English translation is rumored to be difficult to follow.

Four years later, I was still longing after this pattern. There are so many beautiful finished sweaters on ravelry (Ravelry link) and I finally felt up to the challenge. I found an ebay seller who had the pattern and took advantage of extensive googling and ravelry searching for tips.

Of course, I didn't get gauge with the yarn I chose so I had to rework all of the stitch counts. While I was at it (and since that wasn't enough work already), I decided to adjust all the sizing to end up with a sweater an inch or two smaller than the smallest size. I started with the back and it did look small. Blocking helped . . . a little.

I always get to this point in a project and begin to stress about the fit. Up until now, I've always calmed my nerves by making everything a little bit bigger as insurance. (I've also made a bunch of huge sweaters.) Mr. Greenjeans was my first sweater that really fit and, since it was top-down, I was able to try it on as I went. But this? I have no idea. I'm trying to trust my tape measure and just press on.
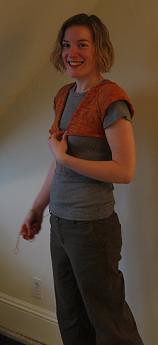
But these are not sleeves, people. These are the two fronts. These are supposed to cover my chest! Maybe blocking will help?

Pinkie Blankie

{ Monday, September 08, 2008 }
With a name like that, could it be any other color?

Pinkie Blankie by Julie Ridl (Ravelry link)
Knit with 6 skeins of Knit Picks Comfy in the Flamingo color on US2 Addi Turbos (honestly, I don't think I ever use different needles, unless I'm making sock on US1 DPNs)

Knit for Mr. Sweetie's new baby neice. I followed the pattern fairly closely, changing it only to add an extra border of stockinette between the garter stitch edge and the lace pattern. I knit 9 repeats across, but could have added a couple more. I was concerned about running out of yarn and ended up with some leftover and a smallish blanket. The baby arrived as I was casting off, so I wouldn't have had time to knit it bigger anyway. Small as it is, I love this pattern and the yarn is super soft and comfy (good choice of name, those knitpickers are always thinkin'!)


Presenting . . .

{ Sunday, July 27, 2008 }
A completed shortypants, with not a shred of yarn to spare!


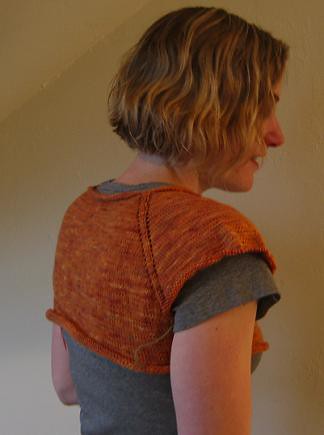
Mr. Greenjeans from knitty.

Sporfarm Merino Wool 2 skeins at 400.0 yards each in the Spiced Pumpkin colorway on size US2 addi turbos

My gauge was off, so I followed the 3X directions to end up with the XS size. Right after dividing for the armholes, I ended up being an inch worth’s of stitches short, which worked well. I didn't have smaller needles for the ribbing at the waist, so I fudged it by decreasing another inch worth's of stitches and stopped when I got too nervous that I would run out of yarn (just above my hips).

I then evenly divided the little bit of yarn that was left (including my gauge swatch) and knit on the sleeves until it was all gone.

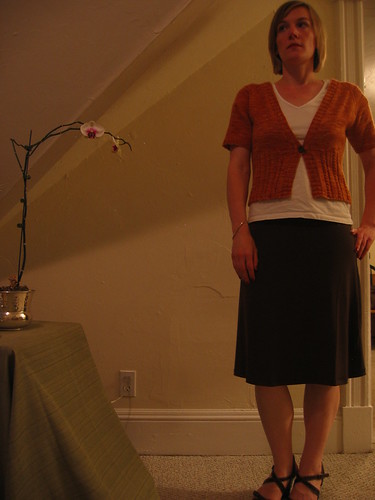
It required the most severe of blockings in order to fit, but I love it still! Its difficult to capture in the photos, but the orange has the most subtle color variations--from almost yellow to almost brown in color that gives it some interest. Lovely!


Reduce, Reuse

{ Wednesday, March 12, 2008 }
I've finished all the knitting and weaving of ends on Mr. Greenjeans (aka Mr. Shortypants) and I have to tell you--it was a little hairy there at the end. I used absolutely every spare inch of yarn that I could and its still short-sleeved and very cropped. Oh yeah, and I'm going to have to block it like crazy to get the button bands to meet. In addition to unraveling my gauge swatch, I also cut off all of the longer ends that were hanging from joining the new ball or picking up stitches and knit with those as well. I actually had to unknit a row on the second sleeve because I didn't have enough yarn left for the bind off. Talk about cutting it close!

But anyway, its all done and ready to be blocked and have the button sewn on, which leads me to the story I really wanted to tell. I stopped by Michael's today to look for buttons. I could have sworn that Michael's used to sell both fabric and buttons, but I couldn't find either at my local store. What I did find were these super cute knitting bags. I was originally drawn to the fabric colors thinking they were regular tote bags and probably would have gotten one anyway, but the fact that they're designed to be knitting bags and have so many pockets just sealed the deal. I got the carry-all traveler and one of the yarn travelers. I usually keep my knitting projects in individual ziplok bags (which I end up replacing periodically once my needles start poking holes in them), so I'm glad to try out these reusable containers. Since I was already buying stuff, I also picked up some wool-ease. I'm dying to make Juliet and I didn't have any chunky weight yarn on hand and how can you beat the price of wool-ease?

After all that, I still didn't have a button for Shortypants and you know what? I came home and looked in my button stash and found the perfect one.

But you know, I might have missed out on those cute bags if I'd just started in the stash.

Mr. Shortypants

{ Friday, February 29, 2008 }

Ha! See that? It says 14 grams. That's every last shred of yarn that I have left and its going to be one sleeve. I don't know if you can see from the picture, but my gauge swatch is under there. I love how this has turned out so far, but this sweater is very fitted, cropped, and soon it will have short sleeves. Not exactly what I had in mind when I started, but I learned an important lesson. I thought I had the yardage required to make the size that I wanted, but didn't consider how drastically different my gauge is from that specified in the pattern. Tighter gauge = more yarn usage. Who knew?

Mr. Greenjeans

{ Monday, January 28, 2008 }
I've been thinking that starting a new large project could help get me out of my knitting rut. I haven't managed to complete a project since the embossed leaves socks, even though I've been spending a lot of time knitting.

So, I dug into my stash and, after several swatches, I decided to cast on for Mr. Greenjeans from Knitty Fall 2007.


My gauge is drastically different from that stated in the pattern, so I ended up using the stitch counts for the 3X size, even though my aim is to make the XS. The pattern gauge is 18 sts over 4" and mine is 29 sts using size 2 addi turbos and this gorgeous hand-dyed yarn I scored at a fiber festival several years ago.

I was a little nervous that this would turn out too small, but it looks good so far and this picture includes an error I made with my stitch counts, so its actually an inch smaller than it should be. I love those happy accidents!


I only have two skeins of this yarn and these pictures are at the end of the first skein (you may be able to see the small amount of yarn I'm holding in the above picture--that's what's left from skein #1!). I may significantly modify this pattern as I near the end of the second skein--we'll see. For now, I'm happy to be out of my rut and I can't put this project down!


Embossed Leaves Socks

{ Tuesday, October 16, 2007 }

Embossed Leaves Socks
Originally uploaded by Kraftykay

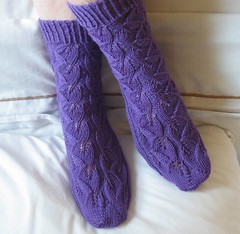
Purple leaves to (not quite) match the gold and yellow ones starting to drop from the trees.

The pattern is Embossed leaves socks by Mona Schmidt from the Winter 2005 issue of Interweave Knits. I knit these on US 1 Clover DPNs out of Lorna's Laces Shepherd Sock yarn in a color which I believe is called Grapevine.

When I started planning this project, I decided that I would knit these socks toe up, allowing me to try them on as I went, thus avoiding the need to knit a gauge swatch. I really like the way the leaves are oriented; however, so I planned to alter the lace pattern to have the leaves point the same way even even I knit them in the opposite direction. It seemed simple enough, but after three tries, I had to admit defeat! What was coming off my needles bore no resemblences whatsoever to either the picture in the magazine or the chart in the pattern. I'm certain that this is doable, but its going to take a bit more than just knitting the chart from top to bottom rather than bottom to top. Maybe I'll still work on that with some scrap yarn, but I wanted to move forward with this project.

In the end, I knit the pattern exactly as written--top down with no modifications. They fit wonderfully and I'm very happy with how they turned out. (And I'm pleased with my decision to hold off on the photo shoot until I had some natural lighting--you can actually see the leaves in the picture!) I knit a good portion of these socks during the Michigan Womyn's Music Festival over the summer and they bring a smile to my face when I remember knitting them and camping at the festival with my sweetie.

The arrival of fall also has me yearning to be in the kitchen. I love to wake up early on a brisk day, get out the pots and pans, and cook the day away! Lately, I've been trying to master Indian food--specifically Palak Paneer, one of my favorite dishes. Since the first of the year, I've been eating a vegetarian and mostly vegan diet and I'm determined to make a vegan version of this dish indistinguishable from the classic one.

The recipe itself is simple enough--cook up spinach, tomato, green chilies and some spices until wilted, then process until smooth. Using clarified butter, fry up onions with more spices, then add spinach mixture along with fried paneer (Indian cheese). Tofu sustitutes easily for the cheese, which doesn't melt and has a similar texture to tofu, and I've been substituting oil for the butter, but the whole thing turns out a little flat. A posting on fatfreevegan.com suggests that the butter adds a richness which may be what I'm missing. The author substitutes soy yogurt, but reports that the results still aren't quite right. I'm thinking I'll try her version and maybe add a little vegan margarine for good measure. Hopefully, that will do the trick!